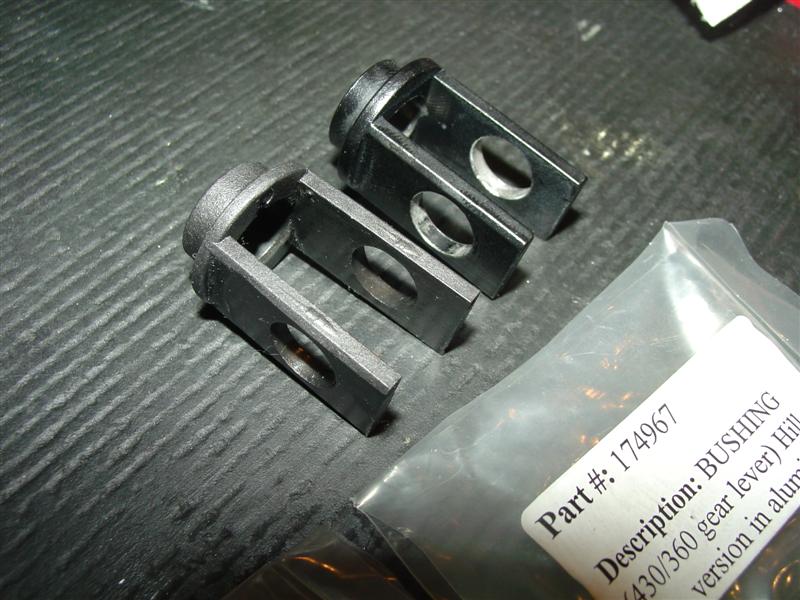
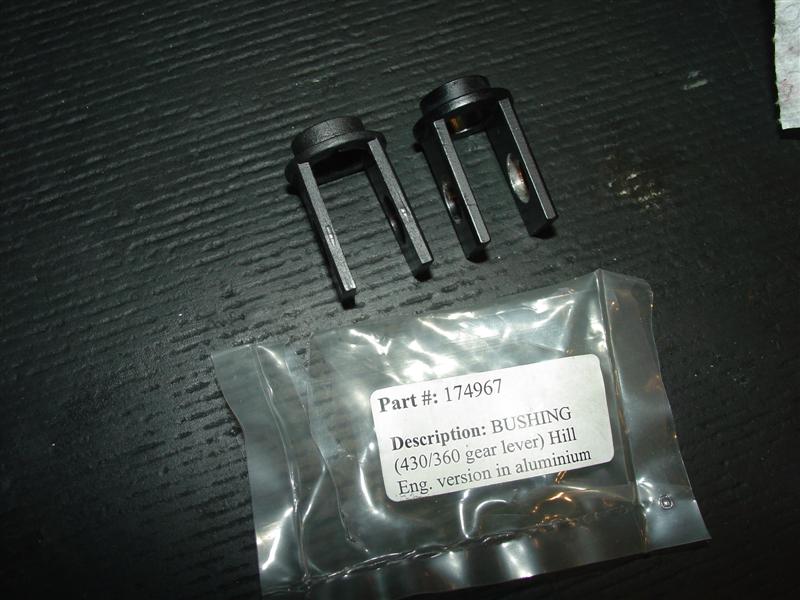
360 Shift Bushing Installation - 174967
This outstanding installation guide of 174967 (360 shift bushing) was prepared on FerrariChat, and is the most detailed write-up we've seen. More information can be seen here: FerrariChat Shift Bushing Installation
Hi all,
Decided to make a quick post to aid all of you out there suffering from the same problem I just resolved. Just got the car a few weeks ago & prior to that a new kevlar clutch was installed. Everything about the shifting and clutch was great... except one very annoying problem. When shifting above 5k from 1-2 my second gear would not engage, felt like a block was there.. no grinding nothing, was not aligned to drop in. So from reading I gathered was my shift cables... well since there was not much info on ferrari chat I dove in & started to adjust the cables slightly to see what was gained or lost..
To do this you really need a lift, reason why is that with constant tweaking & test rides you will be forever jacking up to adjust unless you have some sort of ramp... OK lets assume you have that handled.
-
Take the panel off under car. (sixteen thousand screws).
-
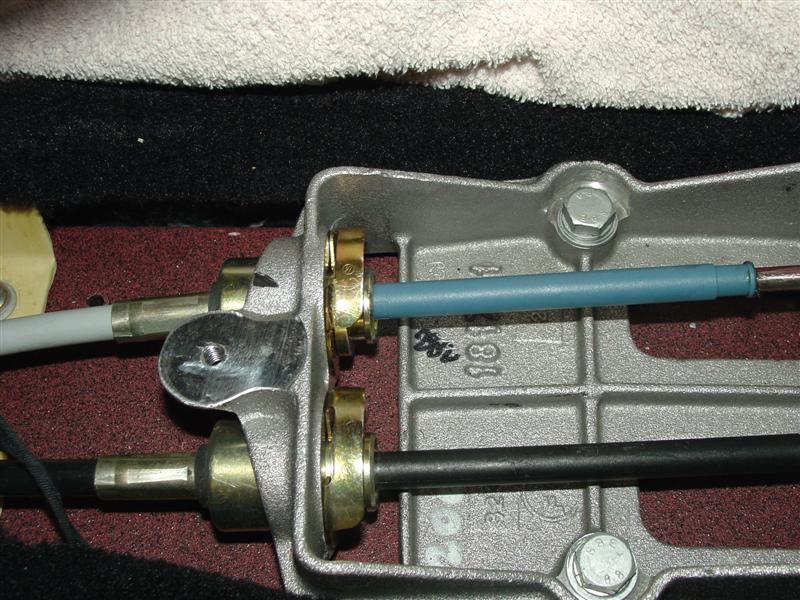
Where cables exit out & end up at gearbox you will see a upper & a lower cable (upper controls distance forward/backward) (lower controls side to side) the lower is what seems to be the one you most likely will need. OK, I am stressing SMALL increments as in couple mm's yields results... so with that in mind - if you turn in will move shifter to the left, unscrewing out will move it to the right. What does this mean? It means if you gain second perfect check 5/6 because now they may have issue.. adjustments will get you right in the middle where everything is perfect... unless...
Here is where my frustration & I am sure others end up... You get second right but now 6th is screwed up doing what second did.. you play more now 2nd & 6th both iffy at times under rpm's.. Finally you realize you are in perfect spot since both 2nd & 6th have issues but you cant get it resolved..
I slept on this & kept looking for the reason WHY I could not get my adjustment (and others here) perfect... Surely a car would not be designed to be "somewhat OK" on shifts... so I got to thinking.. If cables are good, no slack it has to be at the shifter.
Now, my shifter had some "side to side" play & my reasoning was that if there was slight play there it could be lousing me up coming in the gate but not fully pulling over cable. What did I have to lose... So I looked at Ricambis parts sheet & called Daniel. We started discussing it & he had no real ideas of what was common & than he said wait! Hill Engineering makes a bushing out of aluminum vs the original plastic.. They are marketed as basically reverse gear bushing (evidently the plastic original part breaks & you lose reverse). I got excited just knowing (hoping) that this is wear my side to side play was & that Hills part would resolve it.. So I went about removing the center console, shift box, inner assembly & guess what... it was worn enough to make my side to side play & it had a slight crack in it. YEAH! So I got the part in today- put her back together TIGHT & NO SIDE TO SIDE play in shifter.. Took her out for a spin & SUCCESS!! ALL SHIFTING PERFECT!! I did not even have to tweak the cable adjustment under car.. Since I was already in the correct spot. SO, if you have what I expierenced & you have side to side play in your shifter... YOU NEED THIS BUSHING! Pretty easy diy job... About 1 hour to take out & 1 hour to put back in... that is not rushing taking time & constantly washing hands...
So Here is how to replace the bushing...
-
Remove shift ball & nut below it (17mm)
-
Remove 4 screws on shift gate (#2 Phillips)
-
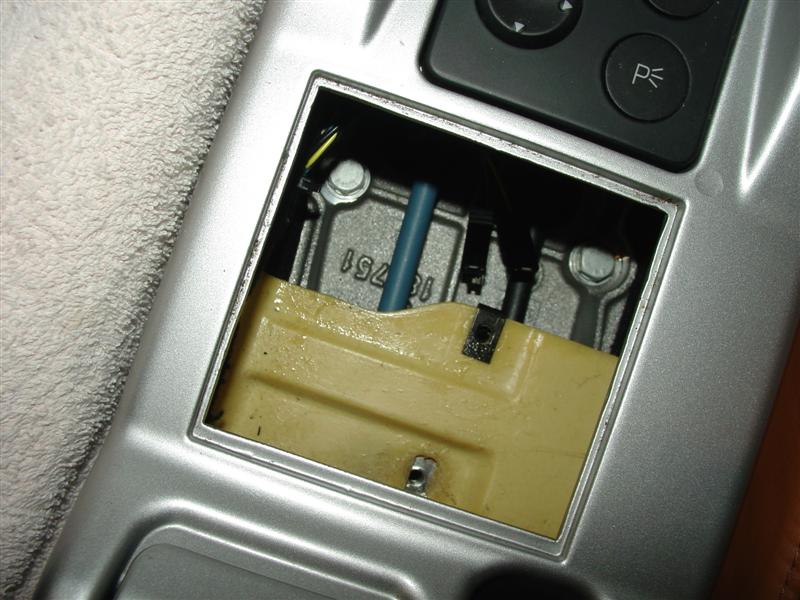
Remove ashtray, remove 1 phillips holding ashtray assembly, remove 2 electrical connectors on ashtray.
-
Remove the allen screw under the assembly you just removed.
-
Remove the leather flat piece at back of console behind e-brake, its just double sided taped in. (dont chow your leather)
-
Remove the 13mm bolt.
-
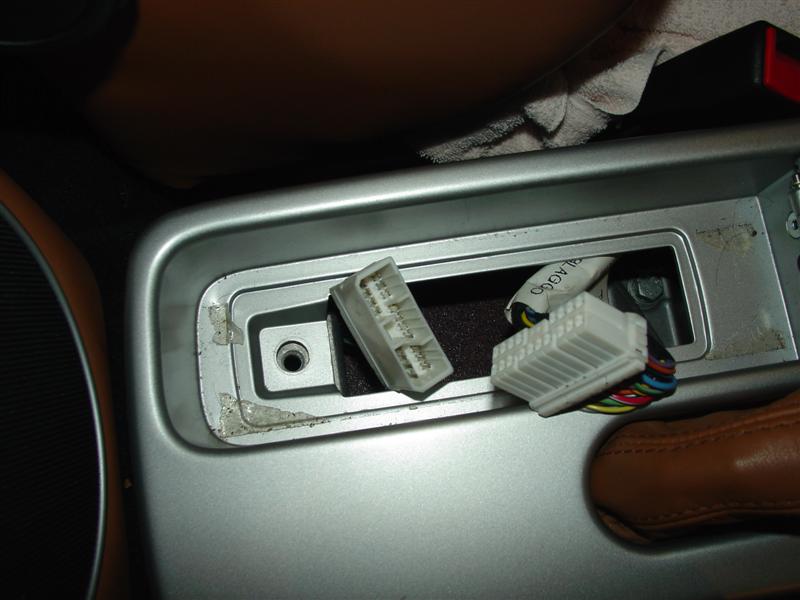
Undo the big electrical harness located in there, push a button on side pulls apart.
-
CAREFULLY lift console up & out (you will notice a black plate below e-brake) thats on a spring it will push down so you can glide out easily.. remember this on reassembly to hold that spring plate down to get e-brake back in console).
-
Have a sip of beer & stare at how easily the console came out- call the wife- look honey - I can work on these..
-
Under shifter you need to POP the right side cable out of its socket. (hint- carefully wrap shifter with something so you can position vise grips on handle - resting on box so when you push down on socket the shifter does not push down with you- you will see what I mean..)
-
I used 2 screwdrivers side by side & prised on box to pop the socket out. It does take force- have no fear (something will give
 )
) -
On left side cable, held in with a plastic push pin, use a thin blade & just pry out (will come right out) cable will fall off.
-
Disconnect electrical coupling to reverse switch.
-
Take a screwdriver & pop up the 2 retaining clips holding cables in shift box.
-
Remove 4- 13mm bolts holding shift box.
-
Using 2 10mm wrenches remove the socket from the right hand cable (remember position the socket was on threads). Left cable end can stay on.
-
Lift shift box out of car & on your bench.
-
More beer & self praise for your accomplishment so far.
-
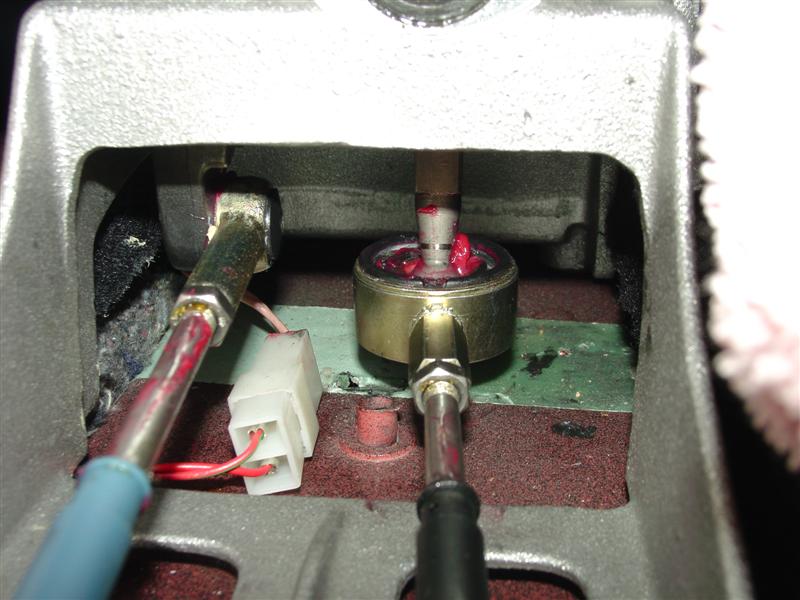
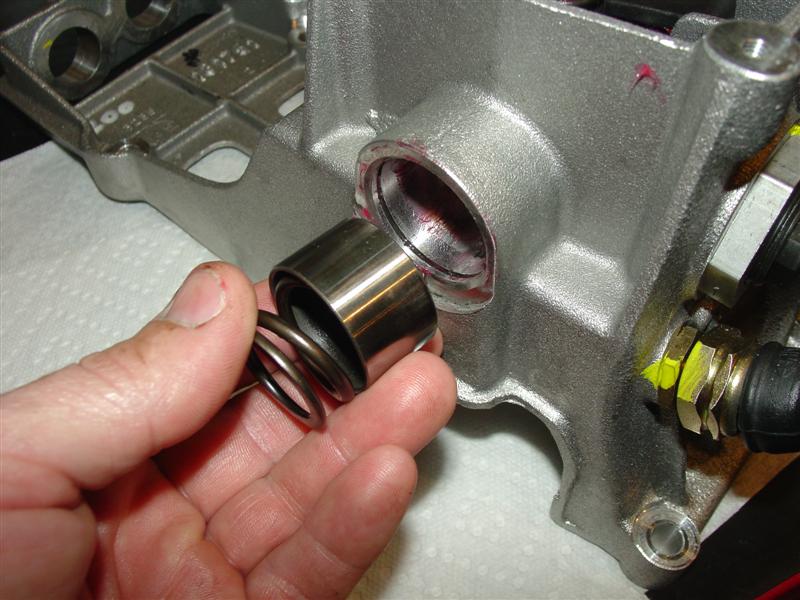
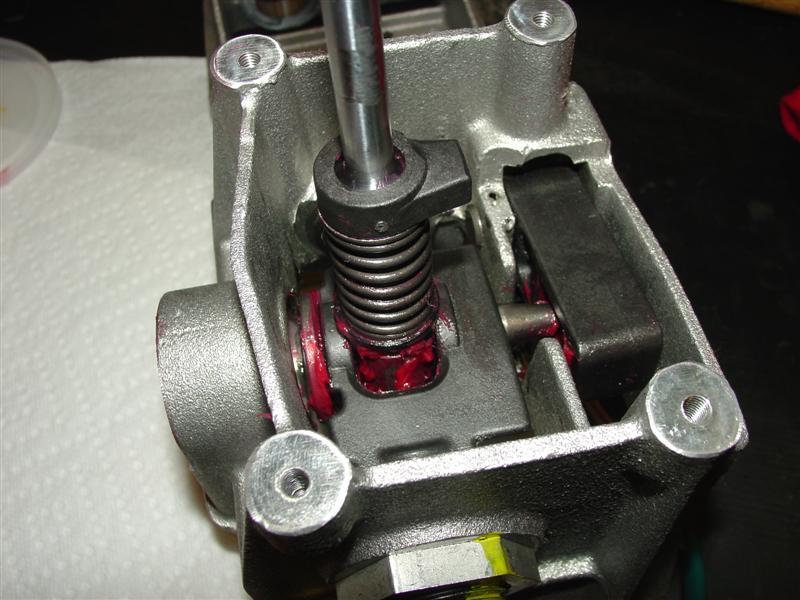
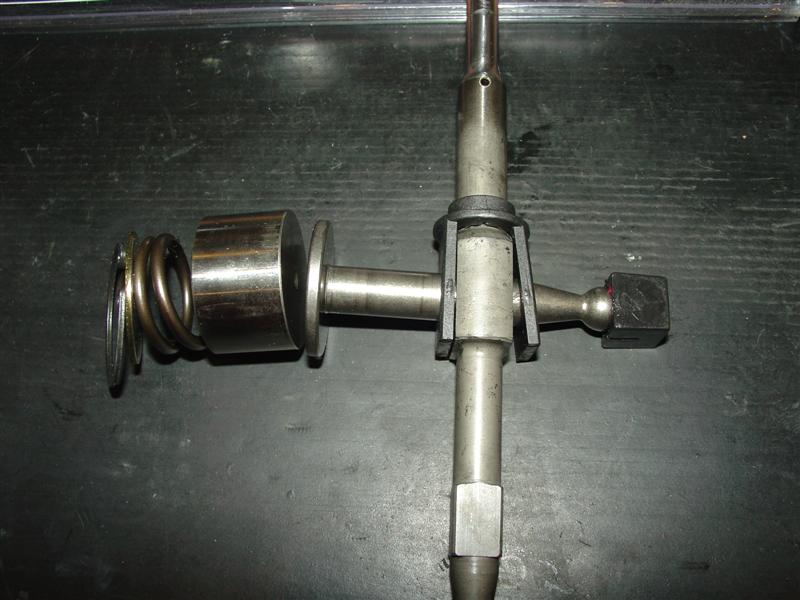
On shift box remove the c- clip on side - remove round plate, spring, sleeve, & the pin that slides through shift rod.
-
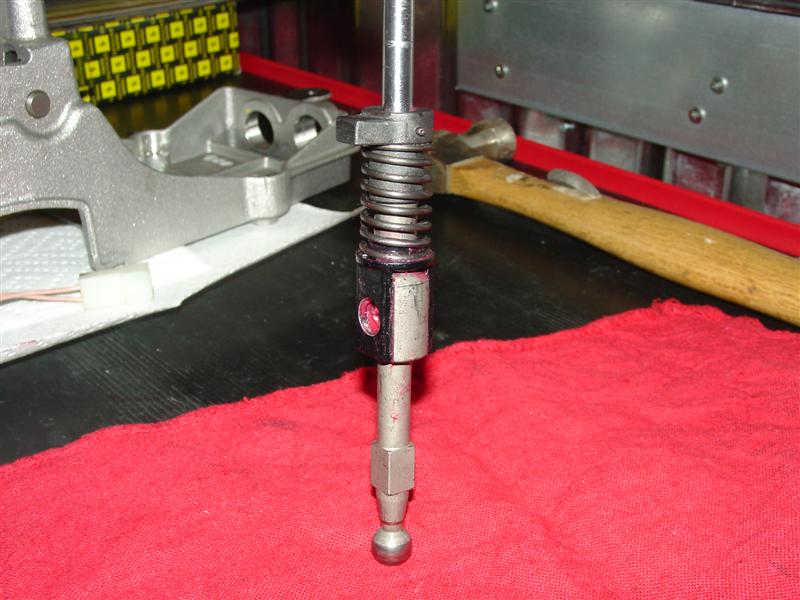
You will need to pop the black square off the end of the pin that slides through.
-
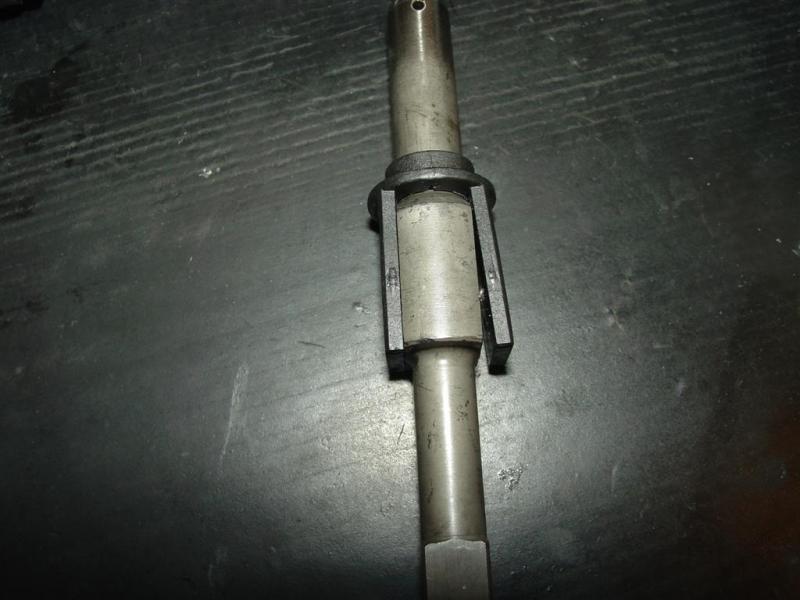
Handle is now in your hand & drive the pin out of shift handle - slide off reverse lockout & spring.
-
Replace your damaged bushing.
Installation is reverse of removal
Congrats- you just solved what many have given up on. You will be rewarded with perfect shifting (as long as no other issues).
Hope this helps someone. Frustrating not being able to shift under speed!