Bumper Skid Plate Installation: 348ts/tb/Spider
The installation notes below are to be used in conjunction with Hill Engineering Bumper Skid Plates SKD-348-PE
In this kit you will find:
- 1 pair of skid plates
- 8 x Stainless Steel Countersunk head Bolts
- 8 x Stainless Steel Washers
- 8 x Stainless Steel Nylock Nuts
You will need:
- 8.3mm drill
- Cordless drill or similar
We strongly recommend that the fitting of these items be carried out by either someone with a reasonable amount of automotive/engineering skills, or by a fully competent automobile mechanic. If you are in any way unsure of these instructions please seek the advice of a local automobile workshop.
With the car securely raised above the ground remove the two front inspection covers that are located underneath the front of the car (one either side).
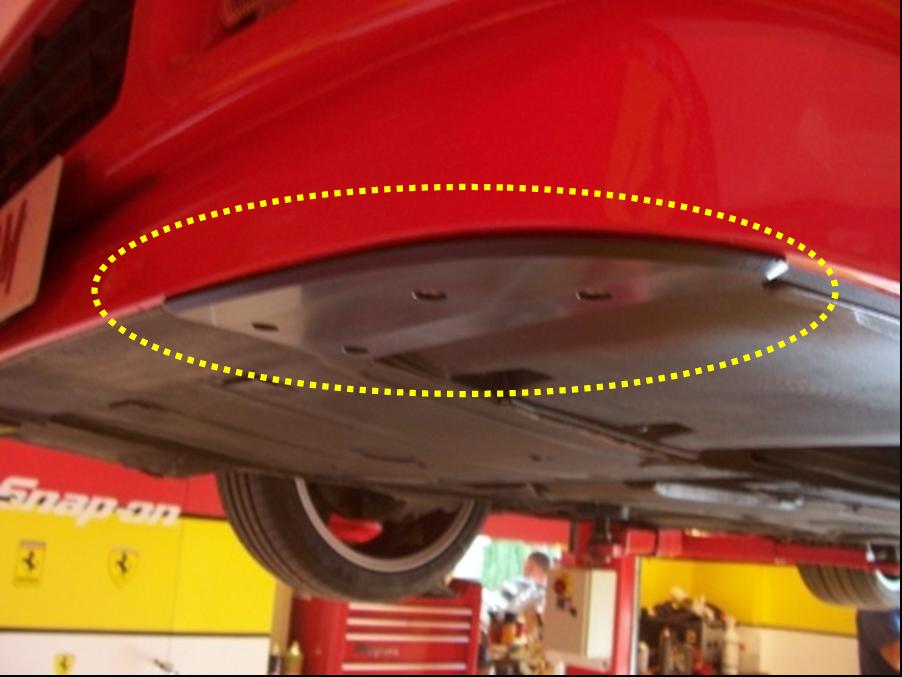
You will be able to see quite clearly the location of where the skid plates are to be mounted as on the 348 there will be two recesses within the bumper. The skid plates are made to fit into these recesses so that the front lip of the skid plate is almost level with the front of the bumper (see picture). Offer the correct skid plate up to the corresponding recess and place the skid plate into the position where the edge of the skid plate is flush with the front and side parts of the bumper.
Once you are happy that the position is correct, mark the positions of the 4 holes that need to be drilled. This can be done with either a white marker pen or a scriber.
Before drilling any holes into the bumper, visually inspect the area where the drill will protrude through from the inside once the hole has been made. Make sure there are no wires or any other items that may be damaged by the drill. Drill very slowly with very little pressure on the drill - Once the hole(s) have been drilled, offer the skid plate up to the bumper and place one of the bolts through the skid plate and through into the bumper. Next fit one of the washers and finally one of the Nylock nuts. Do not fully tighten at this stage.
Repeat this process for the remaining 3 fixings. Once all the fixings have been installed, tighten all fixings to a maximum torque of 12lb-ft. making sure that the final position is flush as described above.
(Alternative method)
On the 348 skid plates it is sometimes easier to drill just one hole to start with whilst getting someone else to hold the skid plate in position, and then bolt up using the one hole and then drilling the remaining 3 holes – either of the above methods will work but it will be down to the installer to choose.
Replace both inspection covers and lower car to the ground.